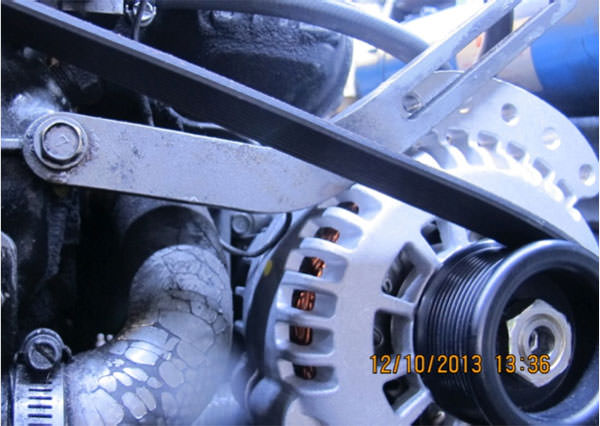
Refitting an Electromaax Alternator
Since a lot of people are asking, I thought it would be a good idea to publish information that will help when refitting an Electromaax alternator. There are a host of issues where you might find yourself needing to refit a new alternator. You may have been noticing signs in your boat for some time, or you may have an unrelated electrical leakage problem or similar issues and find that a complete refit is needed. After some research, you may very well find that Electromaax is one of the best options.

…it doesn’t hurt to look at a specific example of someone doing the same thing
If you are someone who really should be doing this yourself, but just need a little guidance, it doesn’t hurt to look at a specific example of someone doing the same thing.
This can help to walk through the process and look at specific issues or problems that may arise.
Talk to the Supplier
A phone call to the supplier could make a world of difference. Figure out exactly what you want to do and what you want to replace, and then talk it out with others. Send photos.
For example, you may currently have a 1 x 55 amp alternator with an engine-driven refrigeration compressor mounted to it. After talking it through you may find that you don’t want to just replace with a 1 x 160 amp Electromaax, but rather install two alternators.
Although this may not seem like an obvious choice, in actuality it can add some redundancy in the charging system, as well as balance the bearings and crankshaft pulley.
Also, if possible, test out parts and fittings. This may not be an option, but if you have a particularly nice supplier, testing out things like pulleys and belts can be very beneficial. Alignment may be trickier than you think from one boat to the next.
Replace the Serpentine Pulley
This is common. Although not a guarantee, you may very well open it up and find that you have black dust around and on the engine. This can be due to belt slipping both with the compressor pulley and the alternator. With this the case, a new serpentine pulley is recommended. Because of this belt slippage and without replacing the pulley system, you may find that you won’t see any decent charge current, even when running the engine at 2500+ RPM.
Electromaax suggests an installation of the new dual pulleys in a back to back configuration.
- Fit the two crank shaft pulleys in, taking the port and STB alternator belts.
- Switch the water pump pulley to the new wider pulley as opposed to the previous standard A section pulley.
- Fit the new alternator in, now a 120 amp. Make note of alignment.
Some things to consider in the process:
There will be an extra flange in regards to the refrigerator compressor on the top that may be a concern.
Electromaax supplies an extra-long, long bolt that attaches the alternator. This may or may not be strong enough, so you might consider using a wider, stronger bolt. Look closely at the alignment. Look up recommendations on different clearances needed for different spaces.
Remove and Replace Alternator
Now you are actually replacing the alternator. After removing the current alternator, do a test fit using the new bracket on the strut tower bar (STB) side. Make sure you install each bolt and then test to make sure it is solid and secure.
What often happens is once the new alternator is secure and you test fit the new belt, it may be sitting too far in one direction or another. Then that means the second belt won’t line up correctly either. Along with adjustments that could be made to alignment, it’s possible the belts supplied are not the right length.
This is a case when having direct communication with the supplier could help. Or look a little online. But in this case, a new belt with a different diameter may solve the issue. Once this is solved, you are now ready for the second alternator, another 120 amp one. Now that you’ve already put one in, installing this one with the same considerations regarding alignment can be made.
Once this is in, you can hire an electrician to wire the new charging circuit that you installed, including the circuit breakers both the two alternators and the new battery circuits.
Here are a list of other possible adjustments or considerations when installing the alternator.
You can use a modified alternator lug that can be mounted to the same brackets you are already using, which can possibly move the alternator a small amount of space forward or backward, sometimes alleviating any alignment issues.
You may take a look at the lower adjustment bracket (tension bracket) and make sure alignment there, using spacers, may help as well.
Do you need a third pulley system mounted in order to power the engine-driven refrigerator compressor? For this a rebuild of the entire compressor mounting plate is required, which of course is a large chore. If that is something you are not willing to take on, staying with your old A section V belt may be your best option.
There are many variations and contingencies when opening things up and looking closely at what is needed under the hood. A new Electromaax alternator is a great option for many, but you may find that many fixes can be done while you’re in the middle of a job like this.
Leave your response!
You must be logged in to post a comment.